The crochet granny square vest pattern is one of the most achievable and satisfying projects for confident beginners who want to create a wearable piece with a handmade touch. This guide covers the essential decisions, beginner-friendly assembly methods, yarn and hook considerations, common challenges, and practical finishing tips—so you can confidently choose or customize a granny square crochet vest pattern and finish a project that actually fits and flatters. Whether you’re aiming for a colorful statement layer or a neutral wardrobe staple, understanding the basics of granny-square construction puts a professional-looking result within reach.
Key Takeaways
- Modular granny squares make crochet vests flexible, fixable, and easy to size for beginners.
- Testing, blocking, and choosing a joining method thoughtfully are the best ways to ensure a neat, wearable vest.
- Selecting a downloadable PDF pattern saves time with reliable sizing, schematics, and step-by-step assembly guidance.
- What is a granny square vest and why it’s a good project for beginners
- Step-by-step construction methods used in granny square vest patterns
- Best assembly and joining techniques for beginners
- Yarn weights, fiber types, and hook sizes that work well for granny-square vests
- Foundational stitches and joining techniques beginners should master
- Common beginner mistakes and how to avoid or fix them
- How to size and adapt a granny-square vest for different fits
- Time expectations and factors that affect project timeline
- Practical finishing tips that often get left out
- Where and why to use downloadable/printable PDF patterns
- Frequently Asked Questions
What is a granny square vest and why it’s a good project for beginners
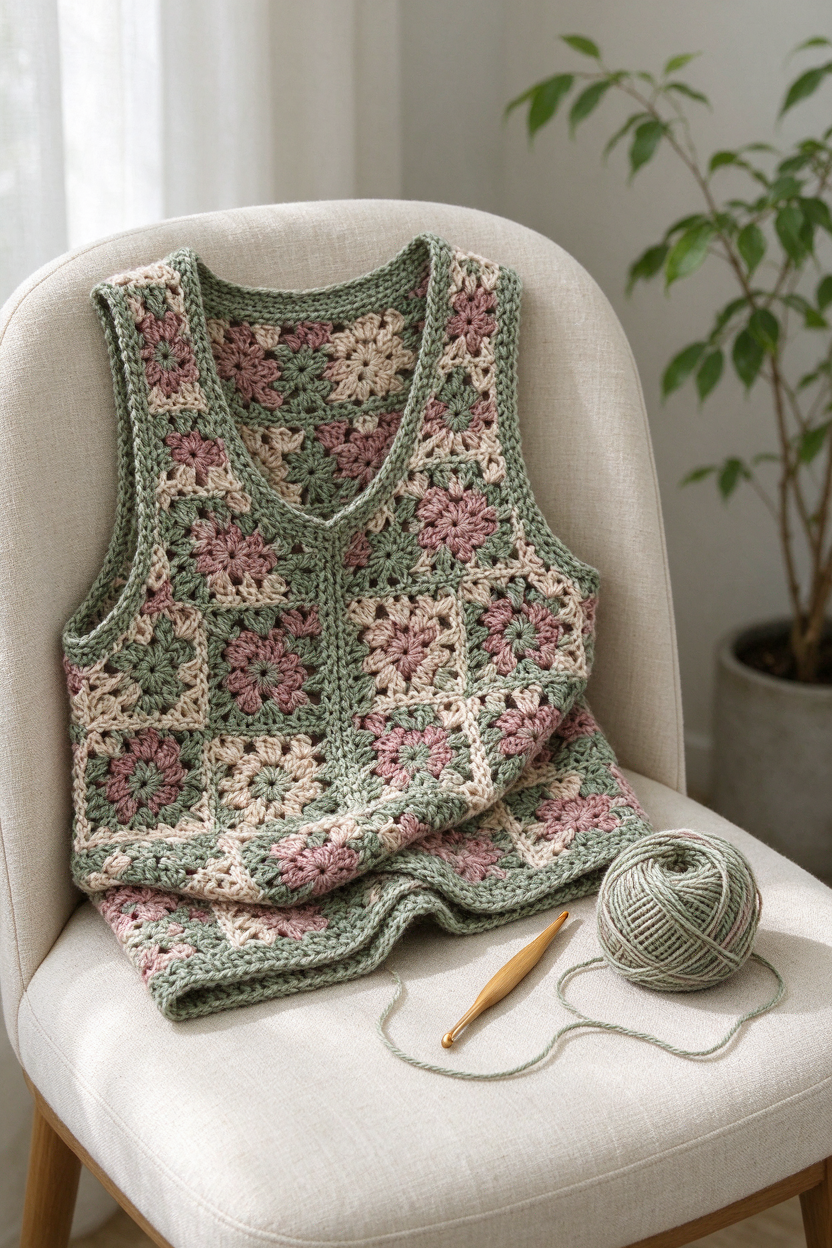
A crochet granny square vest pattern uses classic granny squares—small, modular motifs crocheted in the round—which are then joined to form a lightweight sleeveless cardigan or vest. Each square is typically built with basic stitches (chain, slip stitch, double crochet) making the technique accessible.
Granny square vests are especially beginner-friendly for several reasons:
- Modular Design: You complete one square at a time, so mistakes are easy to fix and the process never feels overwhelming.
- Portability: Take just a hook and a bit of yarn on the go; join the squares later.
- Flexibility: You can adjust the size and fit by changing the number or size of squares before you assemble the vest.
This guide will help you understand each step, from choosing the right yarn and testing your granny square, to blocking and assembling a vest you’ll actually want to wear.
Step-by-step construction methods used in granny square vest patterns
The core of any granny square crochet vest pattern is the motif: the granny square itself. Here’s how most patterns approach construction, with tailored tips for beginners.
Making the Squares
- Start with a Magic Ring or Chain-4 Loop: Beginners often use a chain-4 joined in a loop; some prefer a magic ring for a snug center (Lion Brand).
- Classic Rounds: Each granny square grows with clusters (usually three double crochets) worked into spaces, with chain-2 corners for turning.
The number of rounds determines the final square size and changes the overall proportions of your vest.
Assembly Workflows
- Make All Squares Then Join: The most forgiving method for beginners. You create all motifs, block them to shape, then lay them out for final assembly (Lion Brand).
- Join-As-You-Go: This technique lets you connect each new square to the previous ones in the last round, minimizing loose ends. It requires some practice to keep joins neat.
Construction Order
- Make a test square (to finalize yarn, hook, and gauge).
- Crochet the required number of squares for front and back panels (shoulders, chest width, and length planned with your mockups).
- Block all squares to ensure even sizing.
- Lay out your design (color order/pattern).
- Join squares for panels, then seam shoulder and side edges.
- Add any desired borders or edgings for a finished look.
By treating your vest as one continuous plan—testing, blocking, and assembling as you go—you avoid sizing surprises and uneven seams.
Best assembly and joining techniques for beginners
Joins and seams can dramatically affect how comfortable and professional your vest looks. Here’s what works best for first-time makers:
- Seaming (Mattress or Whip Stitch): Seaming with a yarn needle (using mattress or whip stitch) lets you align squares precisely and makes flat, nearly invisible joins. This approach is often recommended for novices due to its control and forgiving nature (Lion Brand).
- Join-As-You-Go (Slip Stitch or Single Crochet): This method connects each square directly as you work. Slip stitch works through the outer loops for a subtle seam. Single crochet join leaves a decorative rib or ridge, useful if you want visible join lines. Join-as-you-go can be faster but takes a bit of experience to align corners and sides evenly.
Tip: Test out your chosen joining technique on two practice squares to see which look and feel you prefer before working on your full panels.
- Edge Finishing: Once your vest panels are joined, consider single crochet rounds, simple ribbing, or decorative borders at the armholes and neckline. This not only adds polish but reinforces seams for longer wear.

Yarn weights, fiber types, and hook sizes that work well for granny-square vests
Choosing the right yarn and hook is crucial for comfort, drape, and stitch definition in your vest. Here’s how to approach this decision:
- Worsted/Medium Weight: Patterns for adult or all-season wearables often suggest a medium/worsted weight yarn, which has enough heft for structure but isn’t too bulky (Lion Brand).
- Lightweight/DK/Cotton: For summer vests or baby projects, many patterns use cotton DK (double knitting) or soft acrylic, which drapes well and feels cool on the skin (LoveCrafts).
- Hook Size Ranges: Beginner resources most often suggest 5–5.5 mm for worsted and 3.5–4 mm for DK/lightweight cotton, but always validate with your pattern and yarn label (Lion Brand).
Always make at least one test square (“swatch”) with your chosen yarn and hook to assess the drape, feel, and required number of squares for your size. Adjust hook size if your fabric feels too stiff, too loose, or if your squares cup or curl.
Foundational stitches and joining techniques beginners should master
Even the most complex-looking granny square vests use a surprisingly short list of basic crochet skills. Here’s what you’ll need:
- Essential Stitches: Chain (ch), slip stitch (sl st), and double crochet (dc) are the standard requirements for a classic granny square (Interweave).
- Joining Methods: Learn both whip stitch or mattress stitch (for sewing motifs together) and the slip stitch join (join-as-you-go) to expand your options.
- Finishing Touches: Single crochet around edges for neat, comfortable borders; proper weaving in of ends to keep your vest durable and tidy.
- Practical Aids: Counting clusters (groups of double crochets), using stitch markers to keep square corners sharp, and blocking to ensure consistent sizing.
If you’re unsure about any step, practicing on a single test motif before starting your full project can prevent frustration later.
Common beginner mistakes and how to avoid or fix them
Granny square vests are forgiving projects, but a few classic pitfalls can trip up new makers. Here’s how to sidestep or fix them:
- Uneven Square Sizes/Gauge Issues: Always start by making a test square, then block all squares to match in size before joining. Even a small difference between motifs can throw off your panel alignment (Lion Brand).
- Cupping or Curling Motifs: If your squares don’t lie flat, try switching to a larger hook or relaxing your tension. Block finished squares before assembling.
- Bulky or Misaligned Seams: Choose seaming methods like mattress or whip stitch for flat joins. Avoid overly tight single crochet joins if you want a subtle look.
- Color Mismatch or Running Out of Yarn: Estimate required yardage based on a blocked test square and keep track of dye lots. Many patterns give rough skein estimates, but always buy a little extra to ensure consistency (Lion Brand).

How to size and adapt a granny-square vest for different fits
The beauty of granny square vests is that sizing adjustments are usually as simple as changing motif size or layout. Here’s how to plan your fit without getting lost in complicated math:
- Square Size: Crochet more or fewer rounds to make each square larger or smaller.
- Square Count: To widen or lengthen the vest, add more motifs to each row or column in your pattern plan. Community-sourced patterns use anywhere from 24 for cropped styles to closer to 65 for more coverage (Lion Brand).
- Mockup and Measure: After making and blocking one or two test squares, measure their true size, then lay out the number of squares required for your own chest, length, and armhole opening. Pin the arrangement and check against a favorite garment for reference.
- Shoulder and Side Shaping: Some vests use half-squares or small triangles at shoulders—most beginner patterns stick to rectangular panels, which are easiest to assemble and size.
Check your chosen PDF pattern for detailed schematics or a square layout chart and always validate your fit with physical squares—not just pattern math—before joining.
Time expectations and factors that affect project timeline
How long does it take to complete a crochet granny square vest pattern? The answer depends on a few controllable factors:
- Number and Size of Squares: More and/or larger squares mean more crocheting and joining.
- Yarn Weight: Thicker yarns and larger hooks work up faster, but produce bulkier vests.
- Stitch Complexity: Basic granny squares go quickly; complex motif variations take longer.
- Assembly and Finishing: Time is needed for blocking, laying out, joining, and adding borders—not just crocheting the squares.
- Your Speed/Experience: If you’re new to granny squares, allow extra time for practicing joins and perfecting your tension.
Tip: Modular projects like granny square vests allow you to break up the work across days or weeks. Making all your squares first, then joining in batches, often feels more manageable.
Practical finishing tips that often get left out
While granny square vests are everywhere in beginner-friendly crochet circles, it’s these classic finishing techniques—sometimes skipped in quick tutorials—that make the difference between “homemade” and “handmade.”
- Block Every Square and the Joined Vest: Pin and lightly steam or spray each square to set corners and size before joining. Once fully assembled, block the entire vest to straighten seams and smooth out inconsistencies.
- Layout Planning: Arrange all squares on a flat surface before you start joining—especially if you’re using different colors or want a particular pattern flow.
- Edge Treatment: Finish raw armholes, neckline, and the vest hem with at least one tidy round of single crochet, or add decorative edging for style and structure.
- Tidy Ends and Lining (Optional): Use a tapestry needle to weave in yarn tails securely along seams. For heavily worn or baby vests, consider a soft, sewn-in lining for extra stability.
Where and why to use downloadable/printable PDF patterns
While you can certainly “wing it” with a self-designed granny square vest, using a downloadable crochet PDF pattern offers major advantages:
- Printable and Portable: Keep instructions beside you for easy reference and annotation.
- Clear Materials & Sizing Guidance: Reliable PDF patterns typically specify yarn, hook size, square counts, and chest/length measurements—removing frustrating guesswork.
- Step-by-Step Assembly: Many patterns include schematics, layout diagrams, and tips for joining and edging, which help you visualize each step.
When searching for patterns, review the listing for:
- Skill level (look for details that match your experience)
- Yarn/hook recommendations and yardage estimates
- Clear assembly instructions or panel diagrams
Explore downloadable crochet PDF patterns directly from the TwirlBloom shop to find reliable projects and avoid “mystery math” on your first granny square vest.
Frequently Asked Questions
How many granny squares do I need to make a vest in my size?
The number varies by your square size, desired fit, and vest length. Many vests use between 24 and 65 squares. Make and block a test square, measure it, and lay out squares for your panel before joining.
Which joining method will give the flattest seam for a beginners’ vest?
Seaming with mattress or whip stitch (using a yarn needle) offers the most control and produces flat, comfortable joins—ideal for beginners.
What yarn and hook are safest choices for a first granny-square vest?
Worsted/medium-weight yarn with a 5–5.5 mm hook is a common beginner combo, but always test a square and check your pattern’s specific recommendations before starting.
How do I prevent my granny squares from being different sizes?
Make a test square and block every motif before joining. Blocked squares help even out small differences and ensure a tidy joined garment.
Can I mix yarn fibers in the same granny-square vest?
You can, but be aware that yarns of different fibers (like cotton and acrylic) may behave differently when washed or blocked. Using similar weight and care instructions is best for consistent results.
How do I block granny squares and the finished vest?
Pin damp squares flat to shape on a towel or blocking mat, allow to dry, and repeat after assembling for the vest. Use gentle pressure and avoid excessive stretching.
For more ideas for your next project or to find reliable, printable instructions, explore crochet PDF patterns at TwirlBloom.