Crocheting your own pumpkins is a satisfying, seasonal project—and with the right crochet pumpkin pattern, even absolute beginners can make adorable decor or statement pieces. This guide walks you through everything you need to get started: beginner-friendly materials for both small and chunky pumpkins, essential stitches, how to avoid the most common mistakes, and when a downloadable PDF pattern will make your project smoother. If you want your pumpkin to look handmade (not homemade) and to finish with confidence, these steps will help you plan, troubleshoot, and enjoy the process.
Key Takeaways
- Choosing yarn weight and hook size correctly is the foundation for a neat, well-shaped pumpkin—see source-backed options for both small and chunky versions.
- Learning a short checklist of basic stitches and practicing round construction avoids nearly all beginner pitfalls with crochet pumpkins.
- Having a downloadable PDF crochet pumpkin pattern at key points—like material gathering or shaping—can help you track rounds and finish with confidence.
- What to buy first — essential materials and tools
- Basic stitches and techniques every beginner should know
- Choosing the right yarn weight and hook size (small vs classic vs chunky)
- Construction differences — small pumpkins vs chunky pumpkins and practical shaping tips
- Common beginner mistakes and how to fix them
- Finishing techniques — stuffing, cinching, stems and embellishments
- When to download a printable crochet PDF pumpkin pattern
- Troubleshooting checklist and “missing” tips often left out of beginner articles
- Frequently Asked Questions
What to buy first — essential materials and tools
The right supplies make any crochet pumpkin pattern more enjoyable, especially for beginners. Here’s how to shop—or shop your stash—confidently:
- Yarn:
- Small crochet pumpkin pattern: DK/light-worsted recommended (with some keychain patterns holding two strands together for extra density).
- Classic pumpkins: Aran or worsted weight gives a balanced size—firm enough for table display.
- Chunky yarn crochet pumpkin pattern: Bulky or super-bulky yarns (weight 5–6) are best for making larger, “statement” pumpkins. Go down a hook size or two from the ball band for stuffing projects to prevent gaps. [source]
- Crochet hook: Most pumpkin patterns suggest about a 3.5 mm hook for DK, 4 mm for aran/worsted, and a size or two smaller than the ball band for bulky/super-bulky. Metal hooks glide fastest; wood/bamboo hooks give more grip (which some beginners prefer); and soft handles help if your hands tire easily. [source]
- Basic tool checklist:
- Yarn needle (for cinching and weaving in ends)
- Small sharp scissors
- Stitch markers (to track round starts/segment divides)
- Measuring tape
- Stuffing (polyester fiberfill works well; wool roving adds firmness)
- Optional: Button, twig, or extra yarn for stems; ribbon or twine for embellishment.
Before you start: Make a quick swatch with your chosen yarn and hook (about 4″ wide) to test that your stitches are tight enough not to leak stuffing. Adjust hook size if the fabric is loose or see-through. [source]

Basic stitches and techniques every beginner should know
All successful crochet pumpkin patterns—free or paid—use a handful of core stitches and common constructions. Focus your prep time on these:
- Starter stitch checklist:
- Chain (ch)
- Slip stitch (sl st)
- Single crochet (sc)
- Half-double crochet (hdc)
- Double crochet (dc)
- Techniques to learn:
- Working in the round (most pumpkins are started with a magic ring or joined chain)
- Increasing (adding stitches in the round to grow diameter)
- Decreasing (reducing stitches, often used in shaping)
- Stuffing, closing, and “cinching” (pulling tightly to form pumpkin ribs/segments)
If you’re new, you’ll find single crochet or half-double crochet easier to control (and less likely to gape) than double crochet, especially for dense, tidy pumpkins. Practice a few rounds in your chosen stitch before diving in, and review stitch explanations if you’re unsure—see the TwirlBloom crochet stitches guide for step-by-step help.
Choosing the right yarn weight and hook size (small vs classic vs chunky)
Your yarn and hook pairing directly impact the finished pumpkin’s size, firmness, and overall look. Here’s a source-backed overview for different crochet pumpkin pattern types:
| Pumpkin Style | Typical Yarn Weight | Suggested Hook Size | Best For |
|---|---|---|---|
| Small (keychain/mini) | DK or light-worsted Option: 2 strands held together |
~2.5 – 3.5 mm (per pattern; test for density) |
Keychains, small table decor [source] |
| Classic Table Pumpkin | Aran or Worsted (#4) | ~4 mm (or as pattern states) | Medium pumpkins for displays |
| Chunky/Statement | Bulky or Super-Bulky (5–6) | Go 1–2 mm smaller than ball band | Large decor, fast builds [source] |
Fiber tip: Choose cotton yarn for crisp, defined stitches (best for small pumpkins); tweed or wool blends give subtle texture; classic acrylic is easier to wash and softer for bigger pumpkins. Test with a small swatch to see the fabric you prefer.
Construction differences — small pumpkins vs chunky pumpkins and practical shaping tips
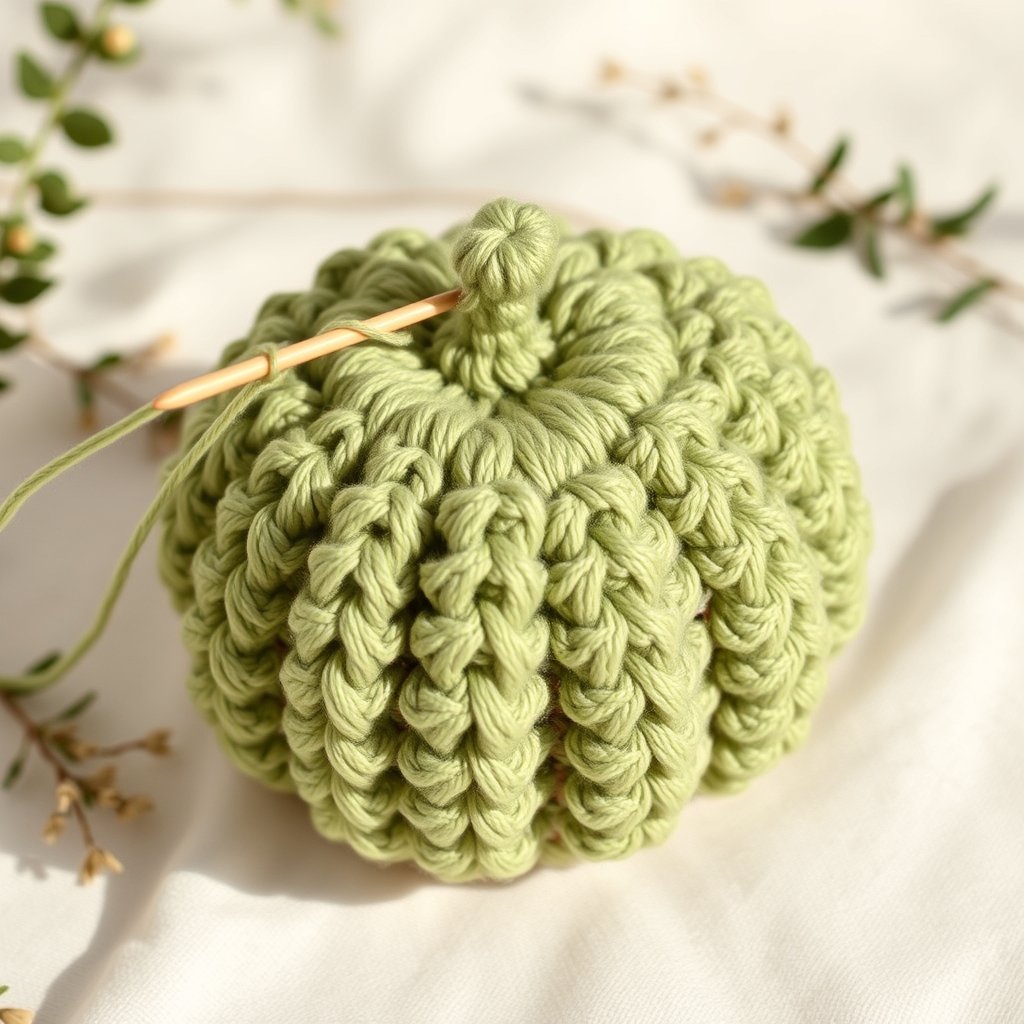
No matter the pattern or size, most pumpkins are crocheted as a squat cylinder or sphere, stuffed, then “cinched” to form ridged segments. Still, the build experience and shaping needs differ by yarn and scale:
- Small crochet pumpkin pattern:
- Uses tighter stitches, sometimes with smaller hooks or held-together strands to avoid stuffing gaps.
- Best to add stuffing gradually—too much at once can stretch the fabric or cause lumpy segments.
- Check stitch count and tension to avoid uneven shapes; marking rounds can help keep symmetry.
- Chunky yarn crochet pumpkin pattern:
- Builds up quickly with large yarn and hooks, but stitch definition may be less crisp.
- Use firm, full stuffing to support size—a squishy fill can make big pumpkins droop.
- When cinching, use strong, long yarn tails or a doubled-up strand for shaping, as bulkier yarns require more force to define segments.
Shaping tips: Use stitch markers to divide the pumpkin before cinching, add stuffing in small handfuls, and gently knead the finished pumpkin to balance the shape before sewing the last segment details.
Common beginner mistakes and how to fix them
Even with a free crochet pumpkin pattern for beginners, a few well-known issues can trip you up. Here’s how to spot them early and correct course:
- Loose tension — stuffing peeks through or fabric sags:
- Use a smaller hook or a denser stitch like single crochet (sc).
- Retest your swatch and check for visible holes; adjust as needed before final assembly.
- Overstuffed or lumpy pumpkins:
- Stuff gradually, checking shape in the hand as you go. Smooth stuffing between palms before adding more.
- Don’t force too much stuffing: it can stretch stitches beyond what the yarn intends.
- Skipped swatch or ignored gauge:
- Even a quick test swatch can help prevent major size surprises.
- If your piece seems huge or tiny early on, adjust before continuing (change hook or yarn).
- Uneven cinching / misshapen segments:
- Use a long, strong needle and thread/yarn. Place markers to divide equal segments before cinching loops around the pumpkin body.
- Securely tie and weave in ends to prevent loosening.
- Unsuitable yarn:
- If the look isn’t what you hoped, review pattern recommendations for fiber and weight—cotton is best for crispness, textured yarns for visual interest.
Finishing techniques — stuffing, cinching, stems and embellishments
The “finishing” stage transforms a basic sphere into a pumpkin with character and durability. Here’s a step-by-step finishing overview—tailored for both small and chunky pumpkins:
- Closing: Use your yarn needle and the long tail from your last round to close the final opening, drawing the stitches together tightly.
- Cinching: Pass a long thread or matching yarn through the center (top to bottom) several times, drawing the yarn taut around the outside. This forms pumpkin “ribs” or segments—typically 5 to 8 divisions.
- Final stuffing adjustment: Add or adjust stuffing before the final cinch to smooth the pumpkin and achieve your preferred fullness.
- Stem and decorative options: Most patterns finish with a crocheted, wrapped, or fabric-covered stem. You can also use a real twig, a button, or wrap yarn or ribbon around the top as a stem. Embellishments like leaves or bows are optional—explore crochet PDF patterns for inspiration.
- Weaving in ends: Securely fasten off and hide all yarn tails, especially those used for segment cinching, to keep the pumpkin tidy and secure.

When to download a printable crochet PDF pumpkin pattern
A crochet PDF pattern isn’t just a formality—it can save you time, reduce errors, and help you stay organized during your project. Especially with pumpkins (where round counts and stitch placement matter), a printable pattern is most valuable at these points:
- Before you purchase materials: Download for an exact, one-page supply and yarn list.
- At the swatch/gauge stage: A PDF pattern makes comparing recommended yarn weights, hook sizes, and finished sizes easy as you test swatches.
- Shaping and finishing: Having a step-by-step guide on paper next to your workspace lets you check stitch counts and ensure accurate segment placement, especially in the cinching stage.
- For future projects and gifting: It’s handy to store the pattern printout with leftover yarn or with the finished pumpkin itself.
If you want to keep your pumpkin-making process smooth and repeatable, explore downloadable crochet PDF pumpkin patterns for print-friendly instructions and round-by-round shaping guidance.
Troubleshooting checklist and “missing” tips often left out of beginner articles
- Favor ergonomic hooks: If working for more than a few minutes at a time, try a soft-grip or thicker-handled hook for comfort.
- Always use stitch markers: Even experienced crocheters lose their place—mark the start of each round and key increase/decrease points.
- Stuff progressively: Add stuffing gradually as you go rather than at the end; it helps maintain symmetry and avoids lumps.
- Leave a long tail for cinching: Cut an extra-long yarn tail when fastening off. This gives more control and security when segmenting your pumpkin.
- Test washability (if needed): If your pumpkin will be handled by kids or exposed to spills, check the fiber’s care instructions or test-wash a small swatch first.
For additional stitch practice, round-building help, and swatch guidance, visit the TwirlBloom beginner crochet guide.
Frequently Asked Questions
How do I choose the right yarn and hook size for the pumpkin size I want?
Match your yarn weight to your desired pumpkin size: DK or light-worsted for small/keychain pumpkins, aran or worsted for classic table pumpkins, and bulky or super-bulky for large statement pumpkins. Select a hook that creates a tight fabric (often one size smaller than standard for stuffed shapes), and always test with a small swatch first.
What basic stitches do I need to know to make a pumpkin for the first time?
You should know how to chain (ch), slip stitch (sl st), single crochet (sc), half-double crochet (hdc), and double crochet (dc), plus be able to increase, decrease, and work in the round. Most crochet pumpkin patterns rely only on these core stitches and techniques.
Can I use chunky yarn if I’m a beginner, and will the pumpkin still hold its shape?
Yes, chunky and super-bulky yarns actually make pumpkin projects faster and easier to handle, but be sure to use a smaller hook than the yarn recommends to create a dense, stuffing-proof fabric. Use firm stuffing and cinch tightly for bold, sturdy shapes.
How do I avoid stuffing showing through my stitches?
Use a hook size that creates a snug, closed fabric—smaller hooks for chunky yarn and dense stitches like single crochet work best. Avoid stretching stitches too much as you work, and check with a quick swatch before starting the main piece.
Is there an easy way to make small/keychain pumpkins?
For very small pumpkins, use DK or light-worsted yarn and a small hook, or hold two strands together for extra density. Stick to simple shapes and avoid excessive stuffing to keep the pumpkin compact and tidy. PDF patterns often specify exact combos that work well for keychains.
How should I care for or clean a finished crochet pumpkin?
Always follow the care instructions on your chosen yarn label. For most decor pumpkins, gentle hand cleaning is sufficient. If washability is a concern (e.g., for items handled by children), test wash a sample swatch to check for any deformation or shedding.
Making your own seasonal decor is both fun and rewarding when you know what to expect at every step. With the right materials, a foundation of basic stitches, and a few tried-and-true tips, your crochet pumpkin pattern project can turn out beautifully, whether you prefer tiny keychain gourds or chunky statement pumpkins. If you want expertly-organized, round-by-round pattern instructions and printable materials lists, explore downloadable crochet PDF patterns at TwirlBloom to keep your pumpkin-making process simple and stress-free.