If you’re searching for a practical guide to making your own crochet advent calendar, this article covers exactly what confident beginners and curious crocheters need to know. Here you’ll find a clear overview of popular calendar types, key construction differences for different skill levels, facts about yarn and stitches for durable, reusable pockets, where to find free pattern and template resources, plus realistic tips for creating a consistently neat, usable calendar. By the end, you’ll have a reliable roadmap to plan an easy, reusable crochet advent calendar project that fits your skills and creative style—without wading through guesswork or scattered advice.
Key Takeaways
- Choosing the right style and construction method makes a crochet advent calendar both beginner-friendly and practical for reuse.
- Medium-weight yarns and mastering basic stitches help create sturdy, uniform pockets that last through many holiday seasons.
- Reliable free crochet advent calendar pattern resources and practical planning tips help you avoid common pitfalls and finish with confidence.
- Popular types of crochet advent calendars
- How construction methods differ for beginners vs more advanced crocheters
- Yarn weights and fiber types for reusable, durable crochet advent calendar pockets
- Basic stitches and techniques beginners should know before starting
- Where to find free crochet advent calendar patterns and printable templates
- Practical tips for ensuring consistently sized pockets (especially for beginners)
- Time expectations and ways to simplify or break up the project
- Simple personalization and embellishment ideas that stay beginner-friendly
- Common pitfalls when assembling and finishing a crochet advent calendar — and fixes
- Frequently Asked Questions
Popular types of crochet advent calendars (what people actually make)
Before you pick a crochet advent calendar pattern, it helps to visualize the main types most crafters make—so you can match your choice to your space, skill level, and how you want to use the calendar year after year.
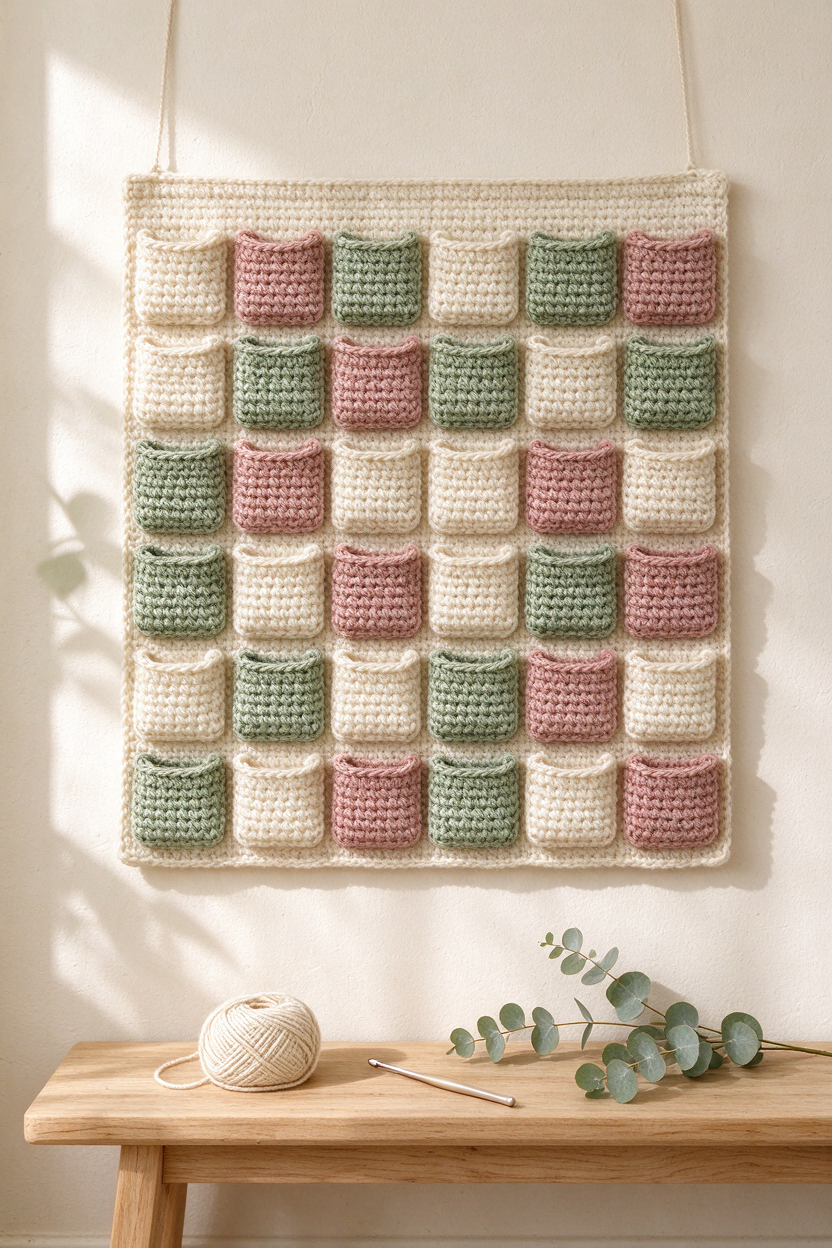
- Hanging pockets or panel: A flat crochet panel or a wall hanging with 24 (sometimes 25) attached pockets or pouches. This is one of the most popular for displaying all pockets at once and is practical for beginners if the pockets are simple rectangles.
- Mini gift bags or stockings: Individual bags or stocking shapes, each acting as its own “day.” These can be strung on a ribbon/cord, laid out in a box, or clipped onto a display. Free crochet advent calendar patterns for this style are common, and the simple bag shape is manageable for newer crocheters.
- Garlands of small shapes: A series of crocheted shapes (like boots, tiny trees, hats, or mittens) joined into a garland. These often have a small opening for treats. Assembly is more involved, but each item is usually straightforward to crochet.
- Amigurumi or dateable toys: 24 mini crocheted toys (often with pouches or hidden spaces). These projects look impressive but typically involve advanced shaping and colorwork, making them better for experienced crafters.
- Pocket blanket or wall-hanging: A blanket or tapestry with attached pockets or flaps, doubling as decor and storage. These take up more space but are durable and versatile (even doubling as a throw after the holidays).
Beginners often prefer the hanging pocket/panel or mini bag/stocking styles, as these involve repetitive, modular pieces and simpler finishing. Advanced crocheters might enjoy intricate garlands, amigurumi toys, or complex colorwork panels. Whatever you choose, planning for reusable crochet advent calendar pockets—ones you can refill each year—is key for long-term enjoyment.
How construction methods differ for beginners vs more advanced crocheters
If you’ve worked some basic patterns but haven’t tackled a full project like a crochet advent calendar yet, it helps to understand what makes a pattern “beginner-friendly” compared to more advanced options.
Beginner-friendly construction
- Uses simple, repeated shapes (typically rectangles or squares).
- Focuses on a limited range of stitches—often just single crochet (sc) or half double crochet (hdc).
- Modular approach: the same pocket is made multiple times, making it easier to maintain consistency.
- Minimal assembly: usually attaching pockets or sewing on simple closures.
- Minimal color changes or decorative trims.
Advanced construction features
- Includes shaping (rounded stockings, hats, tiny amigurumi), often requiring increases and decreases.
- Might use colorwork (stripes, numbers, or images worked into the piece), or complex decorative stitches.
- Integrated linings, layered appliqué, buttonholes, or sewn-in tags.
- More intricate assembly—multiple types of pieces, different joining methods, attaching hanging support or reinforcements.
As a general rule, the more shaping, detail, and assembly a calendar requires, the more advanced the crochet pattern will be. New crocheters planning a reusable project will save time and avoid frustration by choosing a simple shape and finish for their first advent calendar.
Yarn weights and fiber types for reusable, durable crochet advent calendar pockets
The yarn you choose has a big impact on how your calendar looks, how easy it is to crochet, and how durable your pockets are over many holiday seasons. Here’s what’s most important for a reusable crochet advent calendar project:
- Yarn weight matters: Most sources recommend a medium or worsted-weight (commonly labeled as #4) yarn, especially for beginners. It creates a fabric that’s sturdy enough for pockets, still flexible, and is easy to handle and see your stitches as you work (see Lion Brand Yarn beginner stitch guide).
- Cotton yarn: Very sturdy and holds its shape well for pockets. It is less likely to stretch out but can be less forgiving if you pull stitches too tightly.
- Acrylic and blends: Easy-care, often softer, typically machine-washable, and holds up to handling and repeated use. Good for bright, solid colors.
- Wool or wool blends: Slightly elastic and warm, but may need gentle washing. Can be used for a cozy texture; consider if your pockets need to hold heavier or firmer items.
Other considerations:
- Pocket durability also depends on stitch definition (tighter stitches help the pocket hold its shape).
- If your yarn is especially soft or thin, an optional lining or interfacing in pockets can help with shape—but it adds a finishing step.
- Always use the same yarn and hook throughout for consistent sizing and appearance.
If you’d like more help comparing yarn types and project suitability, see our beginner crochet guide for basic yarn advice.
Basic stitches and techniques beginners should know before starting
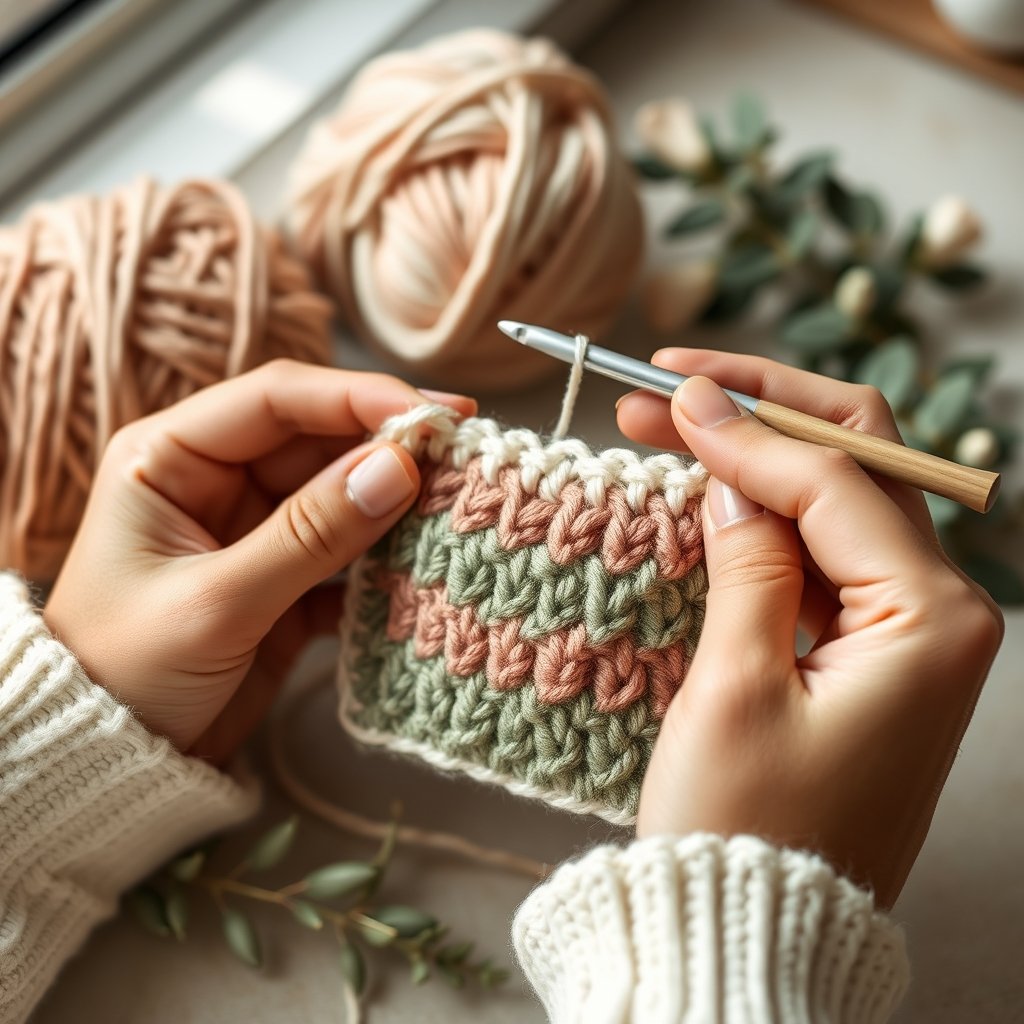
An easy crochet advent calendar for beginners usually relies on a handful of foundational skills. Before starting, practice these key stitches and techniques (source):
- Chain (ch): The foundation for nearly all crochet.
- Single crochet (sc): Most common for sturdy, dense pockets.
- Slip stitch (sl st): Used for joining pieces or finishing edges.
- Half double crochet (hdc) and double crochet (dc): Add height and speed; some patterns use these for larger or looser pockets.
- Treble crochet (tr): Seldom needed for beginner advent calendars, but helpful if making decorative motifs or lacy elements.
Other techniques you’ll likely use:
- Working in rows (for flat pockets) or rounds (for bags/stockings).
- Counting stitches and rows accurately.
- Joining or seaming edges—either with a slip stitch or whip stitch by hand.
- Weaving in yarn ends neatly for a tidy finish.
If you want stitch tutorials or step-by-step guides for these basics, see our crochet stitches step-by-step guide.
Common beginner challenges: Inconsistent tension (which can make pockets different sizes), missing last stitches at row ends, and skipping a quick pocket “gauge” comparison before making all 24. Catching these early makes the final result much neater.
Where to find free crochet advent calendar patterns and printable templates
If you’re not ready to design your own, there are many reliable places to find a free crochet advent calendar pattern—along with printable templates for shapes or numbers. Good free patterns can be found on established craft sites, designer blogs, and select pattern roundups.
Popular styles available for free:
- Mini gift bags: Simple, repetitive, and easy to customize in color (LoveCrafts free patterns).
- Small stockings or booties: Festive shapes that hang well from a string or garland.
- Little amigurumi or toy pockets: More advanced but fun for personalization.
- Pocket panels or wall hangings: Usually labeled by skill level and often include printable number or pocket templates.
What to look for in a quality free pattern:
- Clear step-by-step instructions written in standard US or UK terms (and labeled as such).
- Photos or simple diagrams—especially for assembly stages.
- Printable templates for pocket shapes, numbers, or tags (if your project requires them).
- A stated skill level so you know it matches your current abilities.
- Yarn weight and fiber suggestions (generic is fine; avoid sources that don’t specify at least a general yarn type).
When searching, prioritize patterns from sites or designers with many positive reviews, or those hosted by established crafting platforms. Many free patterns are available as downloadable PDFs, which are often easier to follow than multi-page blog posts.
If you want to browse curated downloadable patterns across a range of project types, Browse Crochet PDF Patterns in the TwirlBloom shop.
Practical tips for ensuring consistently sized pockets (especially for beginners)
Making 24 or more identical pockets is a simple idea, but even experienced crocheters can end up with inconsistencies—especially when making a large set over several days or weeks. Here’s how to keep your reusable crochet advent calendar pockets neat and even:
- Use a stitch marker at the beginning of each row, so you don’t miss or add stitches at the edges.
- Count stitches at regular intervals, not just at the start and end of each piece (for example, after every row or every few rows).
- Make a single “sample pocket” and check its size and shape before making the rest. Use the same yarn, hook, and tension throughout your batch.
- If your pattern suggests it, block finished pockets (gently shape and set them) to even out sizing before joining.
- Plan your pockets in advance—lay them out in order as you finish so any minor size differences are less noticeable (for example, placing slightly smaller pockets at the ends).
- If pockets need extra reinforcement for heavier gifts, consider adding a layer of lightweight fabric as a lining (optional for advanced finishers).
Time expectations and ways to simplify or break up the project
Even a simple calendar involves a lot of repetition. Planning your project in small, manageable stages keeps the process enjoyable rather than overwhelming.
- Break it down into stages:
- Crochet a sample pocket and finalize your technique and yarn.
- Make baskets or “batches” (e.g., 3–5 pockets per evening/session).
- Weave in ends as you go to avoid a backlog.
- Assemble and decorate after all components are finished.
- Simplify where possible: Choose one easy pocket shape for all 24, avoid tricky linings or intricate colorwork for your first version, and use pre-made number tags or iron-on numbers if you don’t want to embroider each day.
- Use shortcuts judiciously: For non-washable decorations, fabric glue can attach numbers or small embellishments quickly.
- Ask for help: If making a family keepsake, consider inviting family members to help with simple embellishment or labeling tasks.
Set honest goals—finishing in one stretch is rarely realistic. Spreading work over several weeks or working with friends makes the process more enjoyable, and you’ll be less likely to rush through the important finishing steps.
Simple personalization and embellishment ideas that stay beginner-friendly
You don’t need advanced skills to make your crochet advent calendar unique. Here are beginner-friendly options to personalize your project without adding unnecessary complexity:
- Easy sewn-on number tags: Use felt, paper, or purchased sticker tags to label each pocket. No embroidery required.
- Pompoms or tassels: Attach small yarn pompoms to corners or as drawer pulls for a playful touch.
- Simple color-blocking: Alternate pocket colors by row or create a repeating palette for a cheerful look.
- Appliqué motifs: Crochet small stars, hearts, snowflakes, or trees using basic shapes and attach.
- Buttons for closures: Large, decorative buttons can make each pocket feel special and secure light treats or notes.
- Theming ideas: Match pocket colors to your favorite holiday palette, or fill with small trinkets that reflect your family’s interests.
For your first project, skip detailed colorwork or complex 3D designs, which often require many extra hours for a result that’s not necessarily more functional. Focus on a few cheerful touches that make your advent calendar a joy to use and display each year.
If you’re inspired to create your own holiday tradition, Explore Crochet PDF Patterns to find advent, gift bag, and seasonal pocket designs you can download and start today.
Common pitfalls when assembling and finishing a crochet advent calendar — and fixes
Assembling the final calendar brings excitement—but also a few common frustrations. Knowing the likely problem spots will help you finish strong with a calendar that wears well and looks great for years.
- Uneven pocket sizes: If some pockets are noticeably larger or smaller, trim your batch before final assembly or use blocking to adjust shape. If you notice early, redo outlier pockets before joining.
- Weak or sagging attachment points: When hanging your calendar, reinforce any high-stress seams with a few extra stitches, or sew a fabric backing or extra row of crochet for support.
- Sloppy or visible ends: Weave in yarn ends securely with a yarn needle, tucking into seams or under several stitches on the back of the piece. Rushed finishing is the biggest giveaway in a hand-crochet project, so take your time at this stage.
- Pockets that sag or lose shape: Dense stitch patterns help, but you can also add a lightweight fabric lining to pockets—or group smaller, less-sturdy pockets towards the top or center of your calendar where less weight will be stored.
- Tension or shaping issues spreading across the batch: Test your first pocket for fit, and don’t be afraid to tweak hook grip or tension if your first few pieces aren’t matching up.
Give yourself room to adjust as you go, and remember—perfectly even pockets are less important than a calendar that’s finished and reusable year after year!
Frequently Asked Questions
What basic crochet stitches do I need to make an easy advent calendar?
The most useful beginner stitches are chain (ch), single crochet (sc), slip stitch (sl st), half double crochet (hdc), and double crochet (dc). These cover most easy advent calendar patterns and pocket construction techniques.
Are there free crochet advent calendar patterns with printable templates I can use?
Yes, many free patterns for advent calendars—especially gift bags and mini stockings—are available online, often with printable templates for pockets or number tags. Look for well-reviewed patterns on established crafting sites and designer blogs.
What yarn weight and fiber should I choose for reusable pockets that will hold small gifts?
A medium or worsted-weight yarn is commonly recommended for beginner clarity and durability. Cotton, acrylic, or blends all work well—just keep your yarn consistent for all pockets. Cotton offers extra structure, while acrylic and wool blends give softness and easy care.
How can I keep all 24 pockets a consistent size so the calendar looks neat?
Make a sample pocket first to test your technique, use stitch markers to avoid missing stitches, and count your stitches often. Consistency comes from using the same yarn, hook, and tension throughout.
How can I simplify an advent calendar project so I can finish it in stages?
Choose one simple pocket design for all days, assemble in small batches, and use shortcuts like ready-made tags or skipping complex linings for your first attempt. Spreading the process over several days or weeks avoids overwhelm and rushed finishing.
What are easy personalization ideas that won’t add technical difficulty?
Add sewn-on number tags, simple color changes, pompoms, or themed buttons. Skip intricate colorwork or 3D elements for your first calendar—stick with cheerful, beginner-friendly additions to make your calendar uniquely yours.
Conclusion: Choosing to make a crochet advent calendar is a rewarding way to create a cherished, reusable holiday tradition. By understanding the main calendar styles, essential stitches, how to pick the best yarns, and how to avoid common pitfalls, you can confidently plan and complete a calendar that fits your skills and vision. Take your time, enjoy the creative process, and celebrate each milestone—your finished advent calendar will brighten many holidays to come.
If you’re ready to find your next project or want more design options, Browse Crochet PDF Patterns in the TwirlBloom shop for curated holiday and everyday pattern inspiration.