If you’re searching for a crochet pumpkin pattern to create cozy, handmade autumn décor, this step-by-step guide will help you choose the right approach for your skill level. We’ll cover the must-know stitches, how to select yarn and hooks for small or chunky pumpkins, what to expect from different construction methods, quick troubleshooting, and how to find quality free patterns (including essential tips for downloadable PDFs). Whether you’re picking your first 3D project or aiming to add a collection of pumpkins to your fall table, this guide is packed with practical advice and source-backed recommendations to ensure your pumpkins turn out beautifully.
Key Takeaways
- Starting a crochet pumpkin requires comfort with basic stitches and the ability to work in the round, but alternative flat-panel methods exist for row-preferring beginners.
- Yarn and hook choices dramatically affect pumpkin size, texture, and ease—smaller yarns for delicate pumpkins, chunky yarn for huggable statement pieces.
- Evaluating a free crochet pumpkin pattern (especially as a downloadable PDF) is crucial: look for clear instructions, skill level, and well-explained abbreviations to maximize success.
- What basic crochet skills and stitches you should know before making a pumpkin
- Common beginner mistakes (and how to fix them)
- Yarn choices for pumpkins — small, classic and chunky approaches
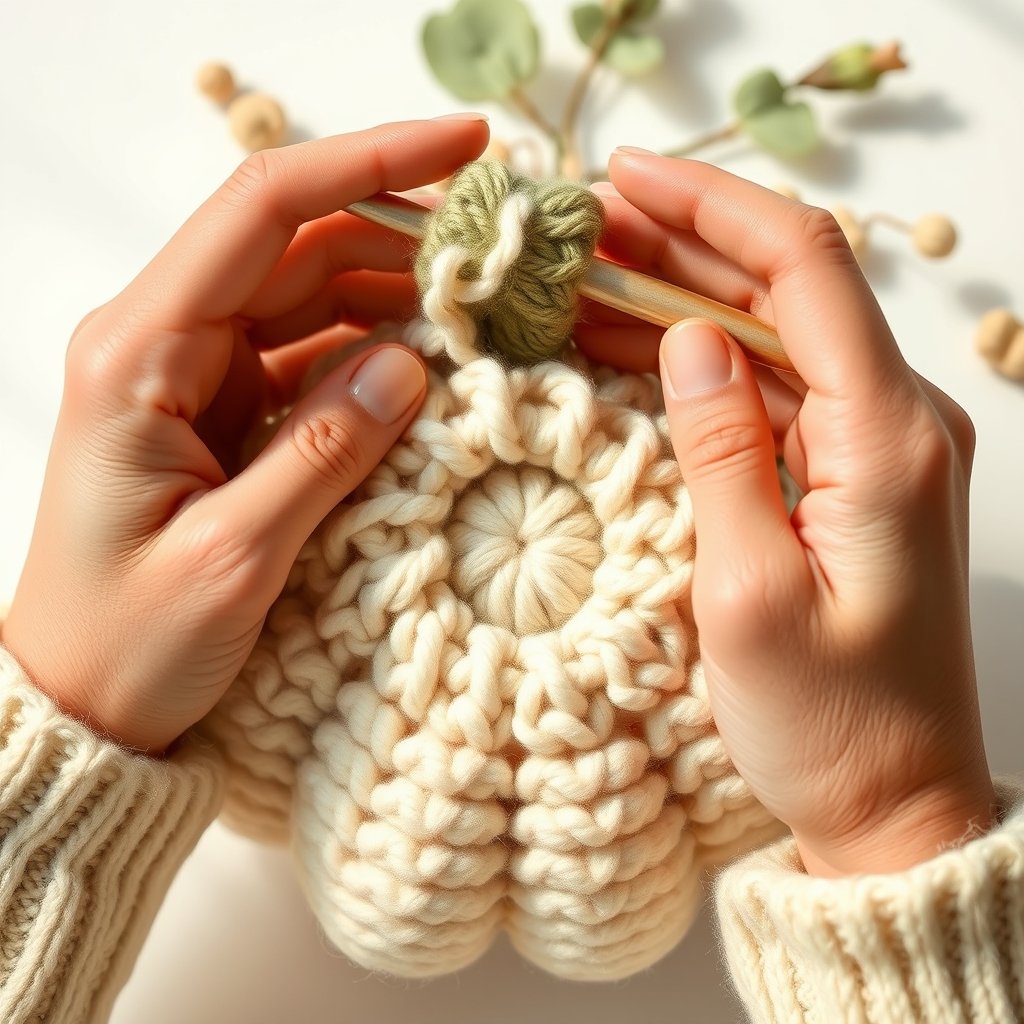
- Which hook sizes to use — practical guidance
- Typical construction methods — in-the-round vs flat panels
- How chunky yarn changes the look, size, and construction (and practical tips)
- Finishing and detailing pumpkins — stuffing, shaping, stems, and leaves
- Where to find free beginner-friendly crochet pumpkin patterns and how to evaluate them
- Additional advice and troubleshooting that pattern pages often miss
- Frequently Asked Questions
What basic crochet skills and stitches you should know before making a pumpkin
Most crochet pumpkin patterns rely on a familiar toolkit of essential stitches and techniques. According to several trusted patterns and guides:
- Magic ring (adjustable ring): Used to start projects worked in the round for a neat, closed center.
- Chain (ch): The foundation of nearly every pattern, either for starting panels or beginning in the round.
- Slip stitch (sl st): Joins rounds or seams panels together.
- Single crochet (sc) / double crochet (dc UK): The main stitch in many beginner pumpkin patterns. Note the US/UK terminology difference: US “single crochet” is UK “double crochet”.
- Half double crochet (hdc) / half treble (UK): Sometimes featured for gentle texture or ribbing.
- Increasing and decreasing in the round: Adds or removes stitches to shape each segment.
Being able to work evenly in rounds is especially important for smooth, symmetrical pumpkin shapes. Tension control and accurate stitch counting help ensure that pumpkin segments are plump and even.
If you’re more comfortable with rows, many pumpkin patterns offer a flat-panel construction option, which is sewn or gathered at the end. For those just starting out, practicing with a stitch marker, counting stitches at the end of each round or row, and checking turning chains (if working flat) will make your first pumpkin experience much smoother.
If you need to brush up on any of these stitches, visit TwirlBloom’s crochet stitches guide for step-by-step basics.
Common beginner mistakes (and how to fix them)
Even simple crochet pumpkin patterns can surprise new makers with a few common hurdles:
- Uneven segment ridges: If one segment looks puffier or tighter than the next, tension is likely uneven. Mark the points where you’ll cinch for each ridge (using pins or stitch markers), and gently pull each gathering pass to the same tightness. Consistent tension is more important than brute strength.
- Rows narrowing or slanting: Missing the turning chain when working flat panels is a classic beginner issue. Always check that you make one chain (or whatever the pattern calls for) before turning for the next row. If your panel is getting narrower as you go, recount your stitches and check the turning chain step.
- Unintended curling: This often happens when the hook is too small for the yarn weight, making the fabric too dense. Try swatching with a hook one size up and compare the drape. If your pumpkin base curls, consider adjusting hook size before starting the full project (as advised here).
- Losing track of stitch count in rounds: This can quickly turn your pumpkin lopsided. Place a stitch marker at the beginning of each round and count your stitches regularly. Counting out loud or using a row counter can also help.
Most early frustrations with a crochet pumpkin pattern are easy to fix with small adjustments and a bit of patience. Practice these habits from the start for smoother, more enjoyable results.
Yarn choices for pumpkins — small, classic and chunky approaches
The yarn you select will decide not only the final look and size of your pumpkin but also how easy it is to work and assemble. Here’s what to know for various pumpkin styles:
- Small crochet pumpkin pattern: Palm-sized pumpkins work beautifully in thinner yarns (commonly DK/light, per pattern library examples) because they allow more detail and prevent stuffing from poking through. Tighter gauge makes for firm, bouncy pumpkins ideal for garlands or accents.
- Classic centrepiece pumpkins: Worsted/aran weight yarn is the “sweet spot”—offering enough bulk for a decorative tabletop pumpkin without being unwieldy. These are ideal for confident beginners.
- Chunky yarn crochet pumpkin pattern: Super-chunky or blanket yarns make oversize, huggable pumpkins or plush pouffes, with a more pronounced stitch texture. Faux-fur and novelty yarns create a soft, fuzzy appearance but will hide individual stitches, requiring counting by feel (source).
Consider fiber type too:
- Cotton: Crisp stitch definition, great for visible segments and sculptural detail.
- Wool/tweed: Adds subtle texture and warmth, classic autumn feel.
- Faux-fur/novelty: Hides stitches for super-soft look—requires different counting/tracking techniques.
Choose yarn to match your project’s desired look and feel. If using non-standard yarn (like faux fur or velvet), adjust expectations for stitch readability and stuffing method.
Which hook sizes to use — practical guidance
Choosing the right hook is essential for creating a dense, tidy pumpkin where stuffing won’t leak out. Instead of memorizing a fixed size, use these principles:
- Match hook to yarn weight and pattern: Follow the specific crochet pumpkin pattern’s recommendation wherever possible.
- For chunky yarns: Many designers suggest using a hook that is a size or two smaller than what the yarn label recommends. This creates a denser fabric, minimizing gaps.
- Swatching is essential: Make a small circle, row, or sample pumpkin in your chosen yarn and stuffing before committing. Check for stitch visibility, fabric density, and drape.
- If in doubt: Adjust until you like the feel—most pumpkins are forgiving, as slight size shifts don’t affect function, but you want enough firmness to hold shape.
This approach ensures your pumpkin fabric is thick but not overly stiff, regardless of yarn or construction method.
Typical construction methods — in-the-round vs flat panels
Most crochet pumpkin patterns use one of these two common construction styles:
- In-the-round: Amigurumi-style pumpkins and quick coasters are usually worked in continuous rounds, often using a magic ring to begin. This approach is well suited to confident beginners comfortable making increases and decreases in a spiral. It produces a fully 3D pumpkin with seamless sides.
- Flat panel folded and gathered: You crochet a rectangle (in rows), then fold it into a tube, seam the sides, and gather the top and bottom to create a pumpkin shape. Ideal if you’re more comfortable working in rows or want very clear edges. This method is equally “beginner” if you know how to work a simple rectangle and sew edges together.
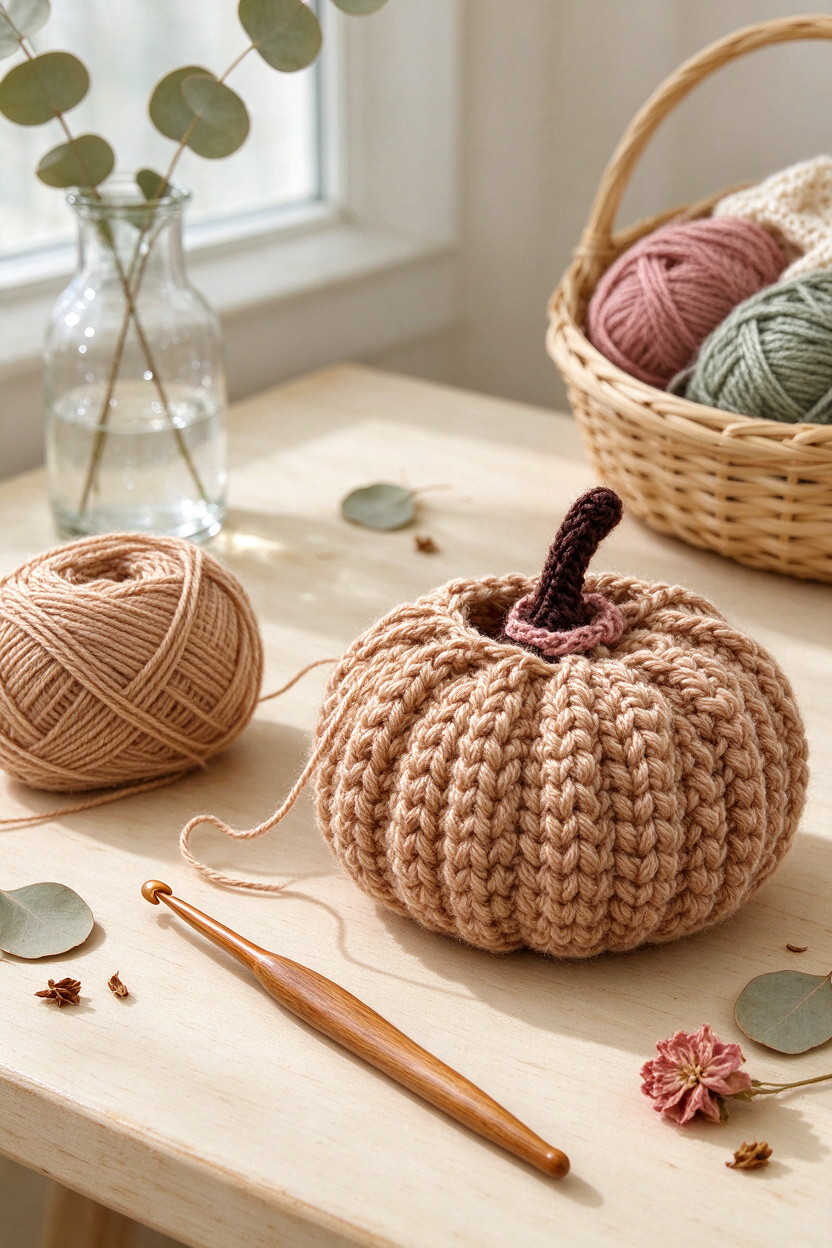
Segment lines (those classic pumpkin ridges) can be added by working in the back loop only (BLO) as you crochet, or by threading yarn around the finished shape after stuffing and assembly.
Which method is easiest? Many new crocheters find simple in-the-round patterns approachable if they already know the magic ring or basic round construction. If rows feel more manageable than rounds, start with a flat panel and gather—the result is nearly identical. Choose the method that matches your current comfort level with stitches and pattern reading.
How chunky yarn changes the look, size, and construction (and practical tips)
Chunky or super-chunky yarn transforms your pumpkin project in dramatic ways:
- Visual impact: Bigger yarn means oversized pumpkins with bold stitch definition. Faux-fur and novelty yarns provide extra softness and a modern, plush look.
- Construction challenges: With fuzzy or thick yarn, stitches may be hard to see. Use stitch markers for the first and last stitches in each round or row. When you can’t see your stitches, count by feel and check the shape as you go (pattern advice).
- Assembly notes: Oversized pumpkins require more (and firmer) stuffing—be sure the fabric is dense enough to hold shape. For large pouffe-style pumpkins, reinforce seams and gathers so they withstand cuddling or sitting.
- Hook advice: Chunky yarn often works best with a hook a size below the yarn label or what you might use for blankets—test to avoid loose stitches and bulging at the gathers.
For inspiration, see pattern examples like the faux-fur pumpkin worked on a 10mm hook, or huggable pumpkins using super-chunky yarn (source).
Finishing and detailing pumpkins — stuffing, shaping, stems, and leaves
The finishing steps will make your pumpkin look polished and sturdy:
- Stuffing: Use enough filling to hold the pumpkin’s shape without stretching the stitches. Polyfill is common. Gently press and shape as you stuff to avoid lumps.
- Shaping and segment ridges: For gathered pumpkins, sew up the top and bottom, then pass a strong yarn or thread through the pumpkin’s center several times to cinch and define segments. Pull each pass gently and space them evenly around.
- Stems: Easy options include crocheting a small tube, using a real twig, or re-purposing a cinnamon stick. A twig or stick adds instant rustic charm—just sew or glue in place for security.
- Leaves and tendrils: Beginners may find it easier to cut felt leaves and stitch or glue them on rather than crocheting them. You can use simple embroidery for leaf veins if desired.
- Neatness: Weave in all yarn tails securely and check that the gathers and stem attachments are firm, especially for larger or heavier pumpkins.
Sources recommend adding leaves, stems, and tendrils after body assembly (example pattern), and note that twigs make an easy no-crochet stem solution.
Where to find free beginner-friendly crochet pumpkin patterns and how to evaluate them
Many high-quality free crochet pumpkin patterns are available online, often as downloadable PDFs. To select the best for your skill level, watch for these features:
- Beginner-friendly signs: Patterns should clearly state the skill level, list required materials and yarn/hook sizes, explain US/UK terms, and provide a stitch abbreviation legend.
- Visual aids: Step-by-step photos or diagrams help when you’re working through shaping and assembly steps.
- Pattern format: Downloadable PDFs are often easier to print and follow than blog-only tutorials. Look for PDFs with clear formatting, consistent row/round instructions, and key finishing tips.
Multiple reliable pattern libraries offer free PDFs for pumpkins, including plush, fuzzy, and tiny versions (pattern roundup). - For paid or shop PDF patterns: Check for pattern support/contact info, licensing and refund policies if relevant, and any user ratings or reviews.
Before committing to a large yarn purchase, consider testing the pattern’s clarity by making a mini version with scrap yarn. This minimizes risk and boosts your confidence.
If you’re looking for more project inspiration, explore TwirlBloom’s crochet PDF patterns to discover well-organized, printable autumn designs.
Additional advice and troubleshooting that pattern pages often miss
Published crochet pumpkin patterns sometimes leave out practical tips that make a real difference for first-time makers:
- Sizing surprises: Your tension, yarn choice, and hook size all affect finished size—so if you want consistent results, make a small swatch or sample pumpkin first.
- Yarn substitutions: It’s best to match not just yarn weight, but the gauge and the look/feel of the sample fabric. Fuzzy yarns may conceal minor mistakes but make it harder to spot and fix them.
- Symmetrical gathers: To keep segment lines looking even, mark gather points before you start cinching, and pull each pass by the same amount each time.
- Stem and assembly reinforcement: If your pumpkin will be handled often or displayed on a table, make sure stems are securely attached and knots are hidden inside the pumpkin.
- Storage notes: Wool is prone to moths, so long-term storage in sealed bags is smart. Acrylic is less risky for seasonal décor in storage.
- Use stitch markers (again!): Especially with invisible or textured yarns, markers will save you hours of backtracking.
Planning ahead—by swatching, marking, and checking each step—prevents most unwelcome surprises, even with an otherwise well-written crochet pumpkin pattern.
Frequently Asked Questions
What basic stitches do I need to make a crochet pumpkin?
Most crochet pumpkin patterns use the chain, slip stitch, single crochet (US)/double crochet (UK), and sometimes half double crochet. You should also know how to work in rounds and do basic increases and decreases.
Should I work a pumpkin in the round or as a folded panel if I’m new to three-dimensional crochet?
If you are comfortable with rounds, in-the-round construction is straightforward for pumpkins. If you prefer rows, a flat-panel method that is gathered into shape is just as beginner-friendly. Both produce similar results; choose what matches your current skill set.
How does chunky yarn change the size and look of a pumpkin, and are there special tricks when using it?
Chunky yarn makes pumpkins larger, softer, and often shows off the stitch texture. Use a hook slightly smaller than the yarn label for denser fabric, rely on stitch markers, and count stitches by feel if you can’t see them clearly.
Where can I find reliable free beginner-friendly crochet pumpkin patterns?
Pattern libraries like LoveCrafts offer several free crochet pumpkin patterns, including downloadable PDFs for both small and chunky pumpkins. Look for clear step-by-step instructions, skill level notes, and well-listed materials.
How do I create the pumpkin ridges and attach a stem without advanced sewing skills?
Segment ridges can be made by threading yarn through the pumpkin’s center and pulling tightly around the sides. For stems, simple options include sewing on a crocheted tube or attaching a small twig with glue or a few secure stitches.
How should I evaluate a downloadable PDF pumpkin pattern before buying or downloading?
Check for a clear materials list, explained abbreviations, skill level indication, and, ideally, step-by-step photos or diagrams. For paid PDFs, look for pattern support or contact info and any refund or licensing policies.
Conclusion: Making your own crochet pumpkin pattern is a satisfying and beginner-accessible project when you’re armed with the right knowledge. Choose materials and a construction method that match your comfort level, use stitch markers and counting aids, and don’t be afraid to start small. Quality free patterns (especially downloadable PDFs) are available to suit all styles and sizes.
If you’re ready to find your next seasonal project, browse TwirlBloom’s crochet PDF patterns and discover inspiring autumn and holiday designs for every skill level.