If you’re searching for a crochet pumpkin pattern that’s genuinely beginner-friendly—but want more than a generic step list—this guide is for you. You’ll learn what basic stitches and techniques to practice before starting, how yarn and hook choices impact your pumpkin’s look and feel, and how to avoid the common mistakes that can turn cute pumpkins into wobbly experiments. You’ll also get real guidance on construction styles (including flat rectangles, rounds, and amigurumi), tips for finishing and shaping, practical ways to substitute materials, and where to find downloadable PDF crochet pumpkin patterns for future projects.
Key Takeaways
- Mastering the chain, single crochet, and slip stitch is crucial for a successful crochet pumpkin pattern, even for absolute beginners.
- Yarn weight and hook size choices directly affect the pumpkin’s size, look, and ease of crocheting—chunky yarns work up faster and are more forgiving.
- Finishing steps (gathering, stuffing, sewing seams) are just as important as crocheting the body for realistic, intentional pumpkin shapes.
- What stitches and basic skills you need to make a crochet pumpkin
- Common beginner mistakes — how to spot and avoid them
- Choosing yarn and hook for small pumpkins vs chunky pumpkins
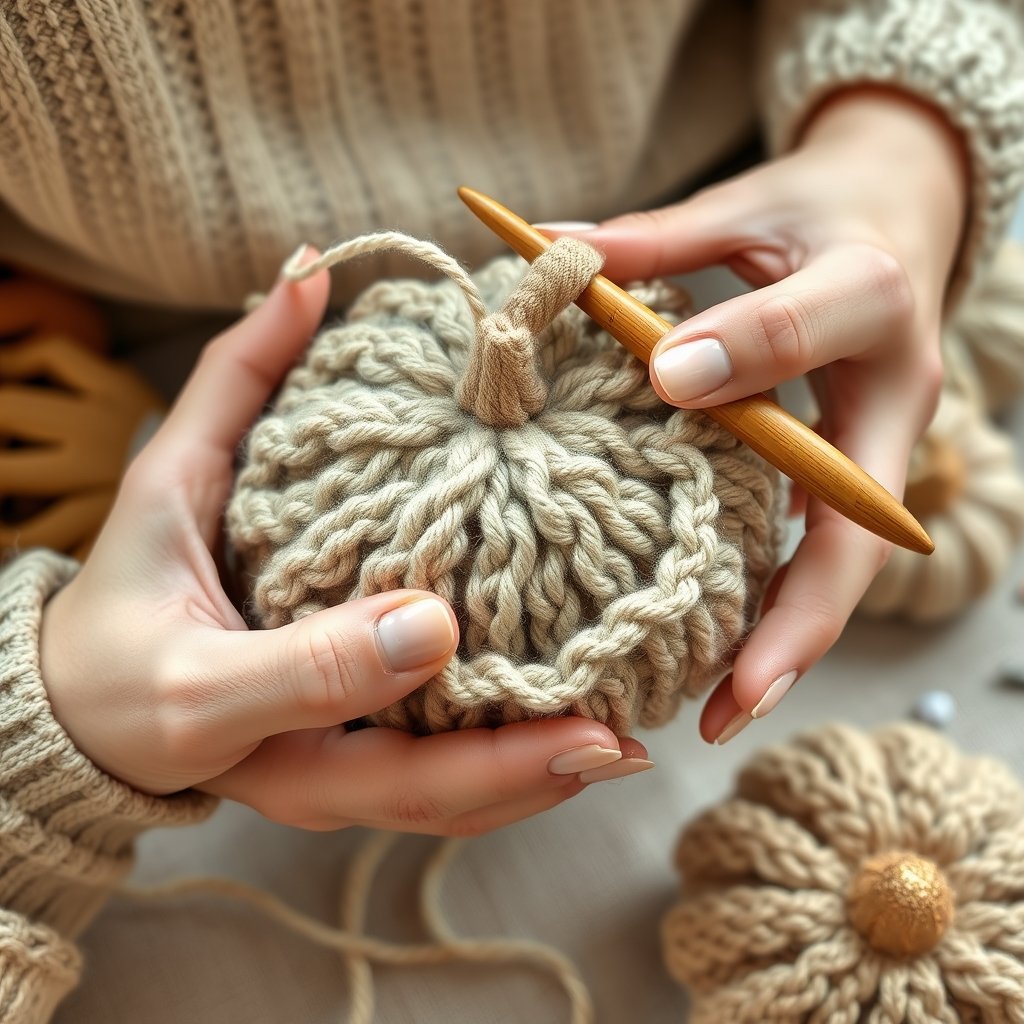
- Construction methods: rounds, flat panels, and amigurumi-style pumpkins
- Finishing and shaping: seams, gathering, stuffing, stems, and details
- Material substitutions and practical customization
- Practical tips and common pitfalls other articles often miss
- Time expectations and realistic completion goals for beginners
- Where to offer downloadable PDF patterns naturally in the post
- Frequently Asked Questions
What stitches and basic skills you need to make a crochet pumpkin
Before you begin any crochet pumpkin pattern, it’s important to know the foundational stitches and core crochet skills most patterns rely on. For a free crochet pumpkin pattern for beginners, you typically need to be comfortable with the following:
- Chain stitch (ch): Used for the foundation row and sometimes as a turning chain. Start with the slip knot, then make a chain of the required length (reference).
- Single crochet (US) / Double crochet (UK) (sc/dc): The primary stitch for most beginner pumpkin patterns. It creates a dense, tight fabric suitable for forming the pumpkin shape (reference).
- Slip stitch (sl st): Used for joining, gathering, and sometimes for surface details (reference).
- Turning chains: Starting each new row with the proper turning chain keeps your work symmetrical and prevents warping or narrowing.
- Counting stitches: Maintaining the correct number of stitches in every row or round keeps the shape consistent.
- Basic finishing: Fastening off (securing your final stitch and cutting yarn) and weaving in ends for a tidy appearance (reference).
- Simple sewing: Used to join reusable seams or attach stems and leaves.
If these feel new, practice working a simple swatch before starting your pumpkin. You might also want to check out our crochet for beginners guide and step-by-step stitch tutorials.
Common beginner mistakes — how to spot and avoid them
Even with the simplest crochet patterns, beginner mistakes can easily throw off the shape of your pumpkin. Here are the most common, plus practical ways to avoid them:
- Missing turning chains: If your pumpkin panel is narrowing like a trapezoid, check that you’re making a turning chain at the start of each row. This is one of the most frequently reported beginner faults.
- Not counting stitches: Accidentally skipping a stitch (or adding one) can lead to uneven edges. Pause at the end of each row or round to count your stitches, especially in the early rows (reference).
- Using the wrong hook size: If your work curls, the hook may be too small for your yarn; if the fabric is loose and floppy, the hook may be too large. Swatch with a few rows and adjust as needed.
- Skipping finishing steps: Skimming over gathering and sewing can leave an unshapely or lumpy pumpkin. Proper gathering, stuffing, and careful seaming are essential for a finished look.
Keep an eye out for these early on—they’re much easier to fix before the pumpkin is fully assembled.
Choosing yarn and hook for small pumpkins vs chunky pumpkins
Material choice has a major impact on your pumpkin’s appearance and crochet experience. Here’s how to pick the right combination for your project goals:
Yarn types
- Worsted-weight (10-ply) yarn: Works well for a small crochet pumpkin pattern, creating more defined stitches and a compact look. Cotton gives a matte, firm feel; acrylic offers softness and stretch.
- Chunky or super-bulky yarn: Essential for a chunky yarn crochet pumpkin pattern. These yarns work up rapidly and make stitches easy to see—ideal for first-time pumpkin projects (reference).
Hook sizes (source-supported ranges)
- Worsted-weight yarns: often paired with a 5–6.5 mm crochet hook.
- Chunky or super-bulky yarns: generally require larger hooks, ranging from about 6 mm up to 15 mm in some patterns and guides (reference).
How material choices affect your pumpkin
| Project Style | Yarn Weight | Hook Size (Examples) | Look & Feel | Difficulty |
|---|---|---|---|---|
| Small Pumpkin | Worsted | 5–6.5 mm* | Tighter, defined stitches; more detailed | Moderate—smaller stitches may be trickier to see |
| Chunky Pumpkin | Bulky/Super-bulky | 6–15 mm* | Soft, plush, and fast to finish | Beginner-friendly—stitches are easy to spot |
*Always refer to your specific pattern or yarn for recommended hook sizes and test a sample swatch before starting.
Test your yarn and hook combo by working a few rows—if the sample curls, try a larger hook; if it’s floppy, size down for firmness.
Construction methods: rounds, flat panels, and amigurumi-style pumpkins
You’ll encounter a few main construction styles in crochet pumpkin patterns. Each has its own look and learning curve:
-
Flat rectangle (panel) method:
- Crochet a long rectangle (usually in single or double crochet), then join the short edges to make a tube, gather the open ends, and stuff. This approach is forgiving about gauge and especially good for a free crochet pumpkin pattern for beginners.
- Often used to create visible “ribs” by working in back loops or using surface slip stitches.
-
Worked in the round (tube or ball method):
- Stitch in a spiral or joined rounds to make a pumpkin body shape. This is common for amigurumi pumpkins and allows for more sculpted, seamless results. It usually requires more precision in stitch counting.
-
Amigurumi-style:
- Usually involves working tightly in the round, using increases and decreases for shaping. Once you’re comfortable with a beginner pumpkin, you might explore amigurumi patterns for more sculpted versions.
Panel/rectangle construction tends to be simplest for confident beginners because seam placement and stitch errors are less visible. Amigurumi approaches result in very round, plush pumpkins but require consistent tension and careful stitch tracking. Chunky yarns make all of these methods easier to see and troubleshoot (reference).
Want clear, printable instructions for your first project? You might appreciate a downloadable PDF with step photos for both panel and round methods (see PDF pattern suggestions).
Finishing and shaping: seams, gathering, stuffing, stems, and details
The finishing steps are often what set apart a wobbly experiment from a show-off-worthy pumpkin. Here’s what to plan for:
- Gathering the ends: With flat or round panels, use a long running stitch (threaded with a yarn needle or hook) around the open edges and pull tight to close—this pulls everything into a neat pumpkin shape (reference).
- Sewing seams: If you worked a flat piece, sew the short ends together cleanly before gathering. Line up rows to avoid a visible “twist.”
- Stuffing: Use soft, fluffy stuffing so the pumpkin holds its shape without bulging. For firmness, gently add more, but avoid overstuffing which can stretch stitches.
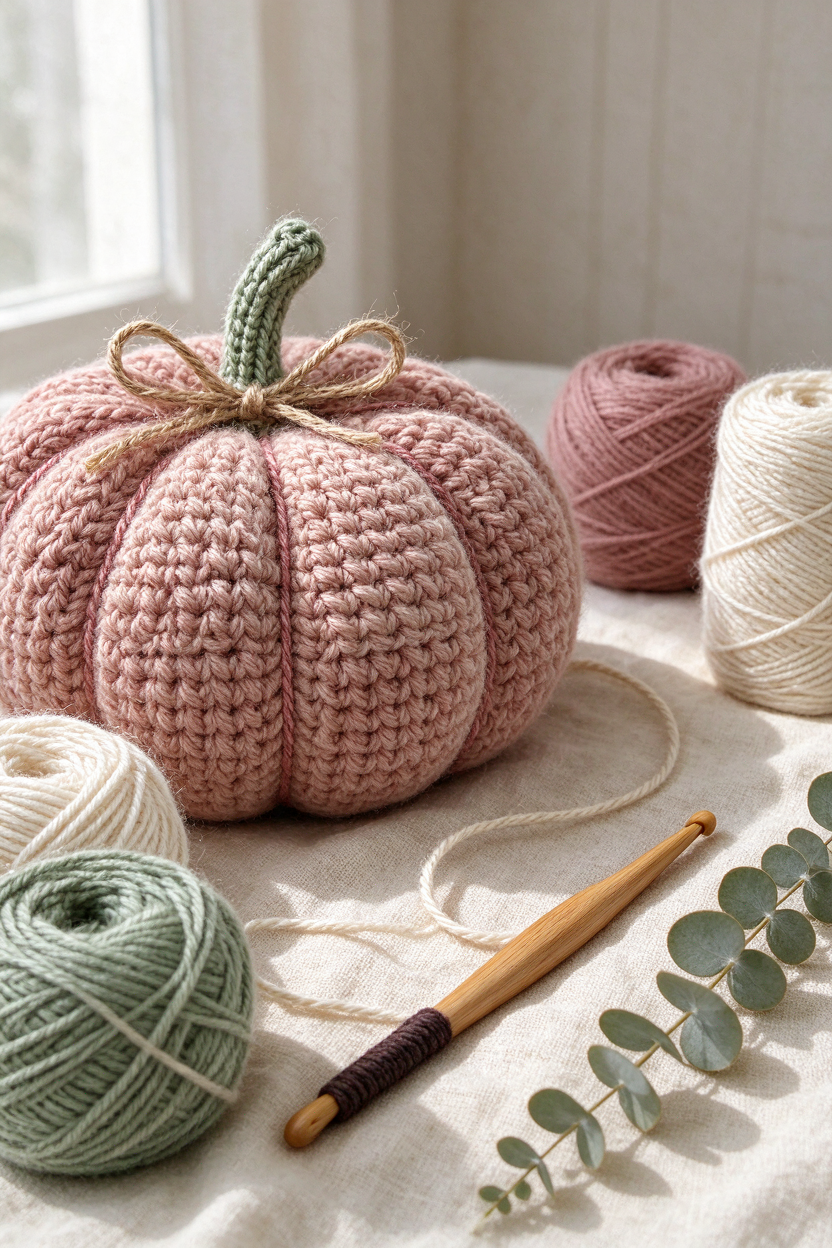
- Attaching stems, leaves, and tendrils: Often crocheted separately and sewn on after shaping. Simple tubes or rectangle “rolls” are very common for the stem.
- Adding ribs/segments: For a more realistic pumpkin, run surface slip stitches or use embroidery to create ridges.
- Finishing: Always fasten off securely and weave in ends for a tidy, durable finish (reference).
Ready to follow a full illustrated pumpkin pattern? Look for a PDF download opportunity at the end of this section for a smoother crafting experience.
Material substitutions and practical customization
Part of the joy of crochet patterns is adapting them to suit your stash or desired look. Here’s what’s safe to swap—and what’s best left unchanged for best results:
- Yarn substitutions: Swapping the brand or color of the same yarn weight is low risk. Changing weight (e.g., from worsted to chunky) will change your pumpkin’s size and structure—always test with a sample swatch.
- Hook substitutions: Adjusting the hook size for your yarn is common—just ensure your stitches aren’t curling (too small hook) or gaping (too big).
- Stuffing materials: Any clean, safe fiber stuffing works, but denser stuffing gives firmer pumpkins.
- Customization ideas: Try chunkier yarn for an oversized pumpkin, surface embroidery for fun faces, or add glittery yarn for a festive look. Leaves, stems, and tendrils can all be personalized in color and style.
- When to follow the pattern: For construction or shaping, stick closely to your pattern if a precise look is required—especially in worked-in-the-round or amigurumi styles. For panels or rectangles, you can usually be more relaxed.
For side-by-side pattern variations (small, classic, or extra-chunky), look for downloadable PDFs where you can compare formats and finishing approaches.
Practical tips and common pitfalls other articles often miss
- Use a stitch marker, especially in round work, to mark your first stitch or seam edge—it prevents unravelling confusion.
- Set a “count checkpoint” every few rows or rounds to help you catch mistakes early rather than redoing an entire panel.
- Match your stuffing to your yarn—fluffy stuffed, chunky pumpkins show off plush segments, while denser stuffing works better for defined, classic shapes.
- Leave a long yarn tail when finishing the body to use for gathering—this is stronger and tidier than tying off and rejoining with a smaller piece.
- Lay out all pieces before final assembly to check sizing, color match, and seam alignment before sewing—this avoids last-minute surprises.
- If mixing yarns or colors, check colorfastness with a quick wash-test (some dye can run, especially in handmade or hand-dyed yarns).
For more troubleshooting and beginner-focused advice, explore our guides to choosing beginner crochet patterns or easy crochet projects.
Time expectations and realistic completion goals for beginners
Crochet pumpkins are often chosen as a quick project, but timing varies widely depending on materials and your own pace. Here’s what to keep in mind:
- Chunky and super-bulky yarns work up faster and show stitch shapes clearly—great for those wanting a satisfying, quick finish (reference).
- Regular/worsted-weight pumpkins require more rows and time, but yield a classic, neat texture.
- Break your project into clear steps: crochet the body, seam (if needed), gather and stuff, finish with details. Assess your own speed by practicing a small sample swatch.
- Don’t be discouraged if your first pumpkin takes longer than you expected—practice makes everything faster, and your next one will go more smoothly.
Where to offer downloadable PDF patterns naturally in the post
If you prefer to follow printable, step-by-step patterns (with photos or variations), here are the least intrusive, most helpful places to look for downloadable PDFs:
- At the start: A “Starter Pumpkin PDF” link is helpful in the introduction for those who like jumping straight into a pattern.
- After finishing and shaping: Offer an optional PDF download for readers ready to try a full, guided project with the construction method described above.
- Within the customization section: Link to pattern collections featuring different sizes (small to chunky) for those interested in trying new styles or adapting patterns.
- In a sidebar or card: A gentle suggestion to browse TwirlBloom’s crochet PDF patterns works for readers who want more curated choices for the season.
When you’re ready for hands-on pumpkin making, having a downloadable crochet pumpkin pattern on hand can make every step smoother—and you’ll always have the instructions close by.
Frequently Asked Questions
What stitches do I need to know for a beginner-friendly crochet pumpkin pattern?
You should be comfortable with the chain stitch, single crochet (US) or double crochet (UK), slip stitch, and creating a turning chain. Basic finishing skills like fastening off and weaving in ends are also important.
Can I use chunky yarn for an amigurumi-style pumpkin?
Yes, chunky or super-bulky yarns are ideal for amigurumi-style pumpkins. They make stitches easier to see and work up more quickly.
How do I fix a pumpkin that is narrowing or curling as I crochet?
Narrowing often means you’re missing the turning chain at the start of each row. Curling may mean your hook is too small for your yarn. Double-check these steps and try a sample swatch to adjust.
What stuffing should I use and how firmly should I stuff a crochet pumpkin?
Any clean, fluffy fiber stuffing works. Stuff firmly enough to hold shape, but not so much that stitches are overstretched or gaps appear.
Can I substitute a different yarn weight or hook size in a pumpkin pattern?
You can often substitute different yarn weights or hook sizes, but always test with a sample swatch to check fabric firmness and pumpkin size before proceeding.
How can I make pumpkin “ribs” or segmented lines without changing the pattern’s structure?
You can use surface slip stitches or lightly embroidered lines on the finished pumpkin body to create the look of pumpkin ribs without changing the main construction.
Final thoughts: With the right basics, materials, and assembly tips, crocheting a pumpkin is a manageable—and rewarding—seasonal project for beginners and confident crafters alike. Take your time with each step, and don’t rush the shaping and finishing for best results.
If you’d like to try more fall-themed or decorative projects, browse TwirlBloom’s crochet PDF patterns for new handmade inspiration.